Course Progress
50%
Course Progress
How to Save and Find Documents on Your Computer
It's Day 9, and today we're going to cover one of the most important skills you'll need when working on a computer: saving and retrieving documents. Whether you're writing a letter, creating a spreadsheet, or working on a presentation, knowing how to properly save and access your files is key to avoiding frustration and keeping your work safe.
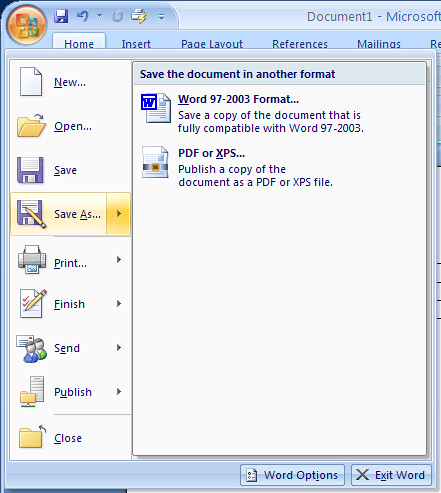
Once you've created or edited a document, go to the File menu at the top of the program.
Select Save As (the first time) to choose where to save your document.
Pick a folder or create a new one, then name your file.
Click Save, and your document will be stored in the folder you selected.
After you've saved the document once, you can just click Save to update any changes you make.
Saving your work frequently ensures that you don't lose any progress if your computer shuts down unexpectedly or if you accidentally close the program. Naming your files clearly and choosing the right folder helps you find them later.
Open File Explorer (Windows) or Finder (Mac).
Navigate to the folder where you saved the document.
Double-click the file to open it.
If you can't find your document, use the Search bar in File Explorer or Finder, and type part of the document's name.
Being able to quickly find and retrieve documents allows you to stay organized and productive. Whether you're resuming work on a project or accessing a file to print, knowing where your files are stored is crucial.
Create a simple document in a program like Notepad (Windows) or TextEdit (Mac). Practice saving it in a specific folder with a clear name, then close the program and retrieve the document using File Explorer or Finder.
To avoid losing unsaved work, get into the habit of pressing Ctrl + S (Windows) or Cmd + S (Mac) frequently while working. This quick shortcut will save your document as you go!